
 By DQCS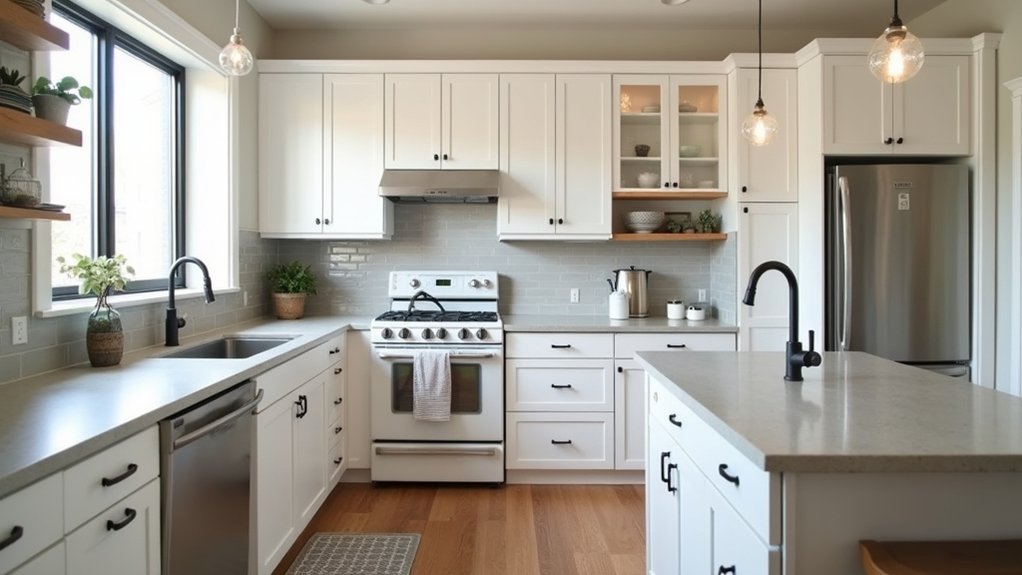
A tired kitchen is like a fogged-up window—you don’t need new glass, you need clarity. You’ll get the best ROI by keeping solid cabinets and working appliances, then targeting the surfaces and fittings that date the space fastest. Swap handles, update the tap, and add layered lighting to change the feel for less. A splashback or benchtop reskin can finish the job—but which upgrade pays back first?
Modernise Your Kitchen by Keeping What Works

If you want to modernise a tired kitchen without blowing your budget, start by keeping anything that still performs well and looks decent. Audit your sink, tap, countertops, and appliances: if they’re reliable and neutral, they’re assets, not problems. Spend where buyers notice function—fix drips, replace worn seals, and upgrade lighting before chasing trendy swaps.
Improve Kitchen organization with drawer dividers, a pull-out bin, and a clear pantry zone; these low-cost changes make the room feel newer daily. Prioritise appliance integration by aligning heights, adding a simple trim kit, or using matching handles so the set looks intentional.
Patch chips, deep-clean grout, and refresh caulk for instant ROI without demolition. Keep receipts and before/after photos for resale.
Refresh Cabinet Doors for a Modern Kitchen
Before you rip out cabinets, look at the doors—because swapping or refinishing them delivers one of the highest “new kitchen” payoffs per pound. If the boxes are solid, you’ll save thousands by keeping them and updating only what you see daily.
Start with Cabinet material selection: foil-wrapped MDF is cheapest but dents; painted MDF gives a smooth, modern finish; solid wood costs more but refinishes well and lasts.
For existing doors, sand, fill chips, prime, and spray a hardwearing cabinet enamel for a factory look on a tight budget.
Don’t ignore hinge replacement: new soft-close hinges fix sagging, improve alignment, and make old cabinets feel premium.
Measure carefully, order samples, and refresh one bank first to confirm colour and sheen.
Swap Handles and Taps for Instant Updates
Freshly updated doors look even better when you swap the touchpoints you use every day—handles and the tap—because they’re low-cost, high-impact upgrades that take an afternoon, not a full refit.
Choose Handle styles that match your cabinet profile: slim bar pulls for a clean modern line, cup pulls for a classic shaker look, or knurled finishes for grip and durability. Measure hole centres before you buy, or pick backplates to cover old marks and avoid repainting.
Next, update the sink with Faucet designs that look premium but install easily. A single-lever mixer with a pull-out spray boosts function and resale appeal.
Stick to standard hole sizes, reuse shut-off valves if they’re sound, and watch for mid-range warranties for best ROI.
Upgrade Kitchen Lighting to Change the Feel
If your kitchen still feels dated, change the mood fast with a layered lighting plan that mixes ambient, task, and accent light for a high-ROI upgrade.
Add under-cabinet LED strips to brighten worktops cheaply, cut energy use, and make old cabinets look sharper.
Then finish with a statement pendant fixture over the island or table to create a modern focal point without a full remodel.
Layered Lighting Plan
Although cabinets and worktops get most of the attention, a layered lighting plan can modernise a tired kitchen faster—and often for less money—because it changes how every surface looks and how the room functions.
Start with ambient lighting that evenly fills the room; swapping an outdated central fixture for a flush LED or slim pendant often delivers the biggest visual ROI.
Next, add task illumination where you prep, cook, and read recipes: aim light at the work, not your eyes, by choosing adjustable downlights or directional track heads.
Finally, include a small accent layer—like a glass-front cabinet spotlight or a picture light—so the space feels designed, not merely lit.
Put everything on dimmers and separate switches to control mood and energy use.
Under-Cabinet LED Strips
When you want a quick, high-ROI lighting upgrade without opening walls, under-cabinet LED strips deliver by turning your darkest work zones into bright, usable space. You’ll cook and prep faster, and your counters look cleaner because shadows disappear.
Choose a neutral 3000K–4000K color temperature, then pick dimmable strips so you can shift from task lighting to a softer evening glow.
For the best bang for your buck, use plug-in kits with adhesive channels, or hardwire only if you’re already updating a switch.
Prioritise energy efficiency: LEDs sip power and last for years, cutting replacement costs.
Add Smart technology with a motion sensor or app dimmer, so lights come on only when needed.
Statement Pendant Fixtures
Under-cabinet LEDs fix the work zones; statement pendant fixtures change the whole room’s mood. Swap a dated dome for two pendants over the island or sink and you’ll get an instant “renovated” feel without touching cabinets.
Keep ROI high by choosing widely appealing contemporary lighting in neutral metals (black, brass, nickel) and simple shades that suit most buyers.
Shop smart: look for UL-listed fixtures, standard E26 bulbs, and finishes that hide fingerprints. Use dimmable LEDs (2700–3000K) so you can shift from task-bright to dinner-warm.
Hang pendants 30–36 inches above the countertop and center them on the work area, not the room. If wiring scares you, reuse the existing junction box and hire an electrician for a quick, predictable install.
Update Splashbacks and Benchtops Without Replacing
If your kitchen feels dated but the layout still works, you can get a high-impact refresh by updating splashbacks and benchtops without the cost and mess of a full replacement.
Start with the splashback: install glass splashbacks over existing tiles, or choose a slim panel system that caps grout lines fast. You’ll lift the whole room’s look for a relatively small spend and add buyer-friendly polish.
For benchtops, don’t rip out cabinetry—re-skin or overlay. Many fabricators can fit composite benchtops or composite-look overlays onto sound substrates, keeping plumbing and appliances in place.
Prioritise the main run and island first; they deliver the best visual ROI. Ask for heat and stain warranties, and choose neutral finishes that suit most homes.
Use Paint and Styling to Modernise Your Kitchen

Although a full renovation can blow your budget fast, paint and smart styling can modernise your kitchen for a fraction of the cost—and still deliver strong visual ROI. Start with doors: clean, sand, and use a hard-wearing cabinet enamel for a factory-look finish.
If you can’t repaint everything, paint only lowers, the island, or a pantry bank for maximum impact per litre. Choose cohesive color schemes—warm whites with black hardware, soft greys with brushed nickel, or deep greens with brass—to make old surfaces feel intentional.
Then style like a pro: declutter benchtops, add one large tray, and group everyday items in matching canisters. Finish with budget decorative accents: a new runner, framed prints, a plant, and warmer globes to lift the whole room instantly.
Frequently Asked Questions
Can I Modernise a Kitchen While Keeping the Existing Layout?
Yes, you can modernise your kitchen and keep the layout: refresh, brighten, and streamline. Start with cabinet painting for high-impact ROI, add lighting upgrades for instant polish, then swap hardware and faucets to boost value.
How Much Will Small Upgrades Cost Compared With a Full Renovation?
You’ll typically spend $500–$5,000 on small upgrades versus $20,000–$60,000 for a full renovation. Use Budget planning and smart Material selection to prioritize high-ROI items like paint, lighting, hardware, faucets.
How Long Do Typical Kitchen Refresh Projects Take to Complete?
You’ll usually finish a kitchen refresh in 1–7 days, depending on scope. Appliance upgrades take hours to 1 day; lighting improvements take 1–2 days. Batch trades, order parts early, minimize downtime.
Do I Need Council Approval or Permits for Minor Kitchen Updates?
You usually don’t need council approval for minor updates, but check building codes and permit requirements first—like a seatbelt, it saves trouble. You’ll need permits for plumbing, gas, electrical, or structural changes.
Will These Updates Increase My Home’s Resale Value?
Yes, if you target high-impact changes buyers notice. Upgrade Kitchen lighting for a brighter feel, add smart Appliance upgrades, refresh hardware and paint, and keep finishes cohesive. You’ll spend less, market better, and recoup more.