
 By DQCS
Mist hangs over the fells as you push open a cottage door that’s tight in its frame. You start with a survey, because damp, movement, and any listed-building limits will decide what’s worth spending on and what’s wasted money. You keep the beams, stone flags, and fire surround, but you avoid sealing the walls with hard cement. You insulate with breathable layers, upgrade ventilation, and use lighting to lift low ceilings—then the layout becomes the next decision.
Survey the Cottage: Damp, Structure, Restrictions

Before you spend a pound on finishes, survey the cottage properly so you don’t bankroll hidden damp, structural movement, or planning constraints that can blow your budget later.
Start with moisture mapping: check gutters, ground levels, bridged air bricks, and salts on internal walls; price remedials before you choose plaster or paint.
Get a structural engineer to review roof spread, sagging floors, cracked lintels, and chimney lean—small ties now can prevent five‑figure rebuilds.
Ask for a RICS survey that includes drainage, insulation, and electrics so you can prioritise spend by payback.
Then validate restrictions: listing, conservation area rules, and heritage preservation requirements may dictate materials and methods.
Finally, protect value: confirm any window or balcony changes won’t compromise lakefront views.
Save (and Avoid) Key Cottage Character Features
Although fresh plaster and new joinery can make a cottage feel “done” fast, the best ROI often comes from saving the original features buyers notice first—and avoiding trendy swaps that date quickly or trigger costly compliance work.
Keep exposed beams, flagged floors, and stone inglenooks; clean, repair, and wax rather than replace. Strip paint from cottage doors if sound, refit ironmongery, and copy existing skirting profiles when you must splice new timber.
On the Cottage exterior, repoint only failing joints and retain slate lines; avoid cement render, uPVC windows, and oversized rooflights that can undermine value and approvals.
Spend where it shows: refresh paths, rebuild loose drystone, and prioritise garden restoration with native hedging and gravel.
Photograph “before” details for matching, and log every salvageable element.
Insulate and Ventilate Stone Walls Safely
Original beams, flags, and slate lines help you sell the cottage’s story, but you’ll protect your resale and your repair budget only if the stone walls stay dry and can breathe.
Start with a moisture check: look for salt bloom, blown plaster, and damp meter spikes after rain.
Avoid trapping water with cement renders or foil-backed boards.
Choose breathable wall insulation like wood fibre, cork, or lime-hemp on battens, and keep a capillary break at floors.
Seal drafts at skirtings, not with impermeable paint.
Pair insulation with smart ventilation techniques: reinstate trickle vents, add passive air bricks high/low, and run a quiet extractor in kitchen and bath on humidity control.
Maintain gutters and pointing in lime mortar to cut wetting at source.
Layer Lighting to Brighten Low Ceilings
Because low ceilings exaggerate shadows and make rooms feel smaller, you’ll get one of the quickest “looks bigger” wins by layering light instead of relying on a single pendant.
Start with slim, flush LED ambient lighting to protect ceiling height and reduce glare on whitewashed plaster. Then add wall lights that throw light up and down; the upward wash visually lifts the ceiling line for pennies compared with structural work.
Finally, use lamps or under-shelf LED strips to kill dark corners and make finishes read warmer at night. Choose warm-dim 2700–3000K LEDs, and put each layer on separate switches or smart plugs so you only run what you need.
You’ll cut energy bills, extend bulb life, and make the cottage feel taller, brighter, and more premium.
Make the Layout Work: Flow, Storage, Kitchen
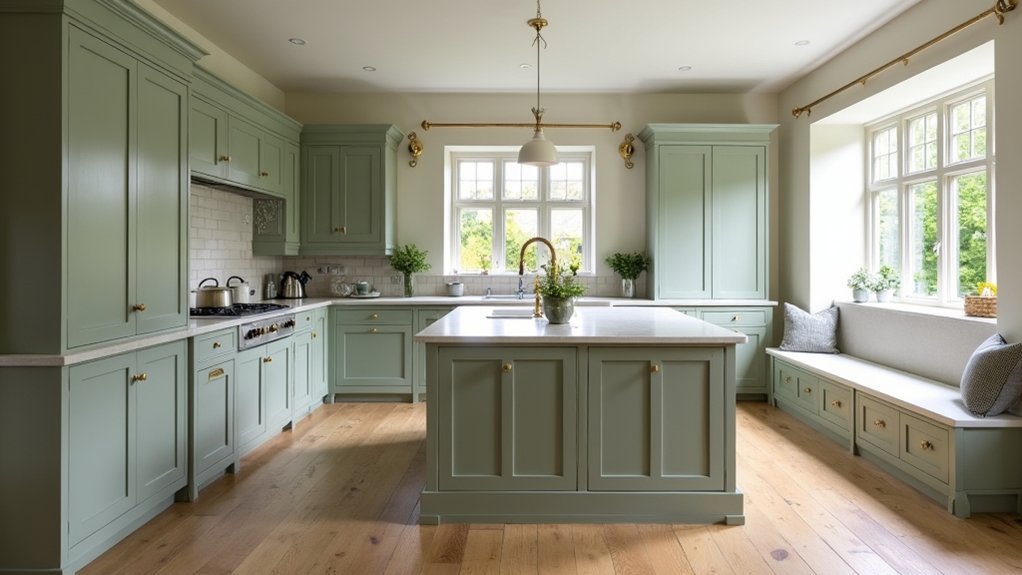
If you fix the flow first, every other upgrade stretches further, since you’ll waste less floor area and add storage without stealing light or headroom. Start by mapping daily routes: door to stove, sink to bin, sofa to stairs.
Then remove pinch points with slimmer furniture, pocket doors, or a re-hung door swing—low-cost moves that unlock usable metres.
For storage, prioritise built-ins where walls already “dead-end”: under-stair drawers, banquette seating with lift-up lids, and full-height cupboards to the ceiling to avoid dust ledges.
In the kitchen, keep the work triangle tight, choose standard carcass sizes, and spend on durable hinges, not fancy fronts.
If you want Open plan design, use a peninsula or glazed screen so space optimization improves circulation without losing zones.
Pick Lakeland Colours and Breathable Materials
Once you’ve smoothed the flow and banked more storage, the next best ROI comes from finishes that suit Lakeland’s damp, changeable weather—pick colours that hold up in low light and materials that let the cottage breathe.
Build your Color palette around warm off-whites, muted sages, slate blues, and soft clay tones; they brighten rooms without showing every scuff like stark white. Use scrubbable, matte mineral paint on plaster and woodwork to hide imperfections and cut repaint cycles.
For Material selection, prioritise lime plaster, clay paint, and breathable insulation where you can; they manage moisture and reduce mould callouts.
Choose oiled oak, stone, and wool for floors and soft furnishings; they age well, resist condensation, and photograph better for resale.
Frequently Asked Questions
Can I Rent the Cottage as a Holiday Let After Renovation?
Yes—you can, but first confirm planning rules and mortgage terms. Next, register for Vacation rentals, set compliant safety checks, and price smartly. Use tight Property management to cut voids, control costs, and maximize ROI.
How Much Will Insurance Premiums Change After Upgrading Electrics and Heating?
You’ll usually see premiums drop 5–20% after upgrades, if you document Electrical safety and improved Heating efficiency. Get updated certificates, tell your insurer, compare quotes annually, and budget for inspections to lock in savings.
Do I Need Planning Permission for Adding a Wood-Burning Stove or Chimney Liner?
You usually don’t need planning permission for a wood-burner or chimney liner, but you must meet stove installation regulations and Building Control sign-off. In listed/conservation areas, ask first. Budget for chimney maintenance to protect ROI.
What Grants or Tax Relief Exist for Restoring Heritage Lakeland Properties?
Seek savvy, savings-savvy support: you can apply for heritage grants from the National Lottery Heritage Fund, Historic England, or local councils, and claim tax relief like VAT reductions on certain repairs—track eligibility, invoices.
How Long Should I Budget to Live Elsewhere During the Renovation?
You should budget 6–12 months living elsewhere; complex heritage work can stretch to 18. Secure Temporary accommodation on a monthly rate, track your renovation timeline weekly, and add a 20% time contingency to protect ROI.