
 By DQCS
If you’re renovating a basement, you’ll protect your budget by treating moisture control and layout planning as one decision, not two. You start by diagnosing dampness, then stop water outside with grading and drainage before you seal cracks or insulate. Next, you plan walls around posts, beams, and HVAC so you don’t pay twice to move ductwork. Code items like egress and ceiling height can make or break the plan—so what do you check first?
Diagnose Basement Moisture Before You Renovate

Before you spend money on framing, drywall, or flooring, confirm your basement stays dry under real-world conditions. Inspect after heavy rain and during snowmelt; document damp spots, puddles, efflorescence, and musty odors.
Tape plastic squares to walls and the slab for 48 hours to spot condensation versus seepage.
Measure Indoor humidity with a hygrometer; if it’s consistently above 50–55%, budget for dehumidification and air sealing before finishes.
Check rim joists, pipe penetrations, and sump discharge for leaks, and test any floor drain for slow flow or backups.
Review past utility bills and run-time on existing dehumidifiers to estimate operating cost.
This diagnosis protects ROI by preventing rework, ruined materials, and Mold prevention failures.
Fix Exterior Drainage to Stop Water at the Source
Before you finish any basement renovation, you’ll get the best ROI by keeping water from reaching your foundation in the first place. You should regrade soil so it slopes away from the house, because even small negative grading can drive costly seepage and mold risk.
You’ll also extend downspouts and confirm gutters discharge well away from the wall, so roof runoff doesn’t overload your footing drains or hydrostatically pressure your slab.
Grade Soil Away From Foundation
Why spend money waterproofing a basement if roof runoff and surface water still flow straight to your foundation? Start with soil grading so the ground slopes away—aim for about 6 inches of drop over the first 10 feet. That small earthwork investment reduces hydrostatic pressure, lowers humidity, and protects your framing, insulation, and finishes from rot and mold claims.
Walk the perimeter after a hard rain and flag low spots, puddling, and soil that’s settled near the wall. Add compactable fill in thin lifts and tamp it to limit future settlement. Keep the final grade below siding and wood trim to avoid wicking and insect damage.
When you correct the slope, you improve foundation drainage performance and cut the odds of expensive interior tear-outs later.
Extend Downspouts And Gutters
Even if you’ve nailed the soil slope, short downspouts and leaking gutters can still dump hundreds of gallons right at the footing during a single storm. That’s a direct path to basement dampness, efflorescence, and future framing rot—expensive to fix after you finish the space.
Inspect gutters for sagging, seam leaks, and clogs; reseal joints and add hidden hangers so they hold pitch.
Then prioritize Rainwater diversion: run downspouts into solid pipe or high-quality Gutter extensions that discharge at least 6–10 feet from the foundation, or to a proper daylighted outlet.
Keep the run sloped, protect outlets from crushing, and add splash blocks where needed.
Verify flow during a hard rain so you’re not financing drywall repairs later.
Waterproof and Seal Walls and Slab Correctly
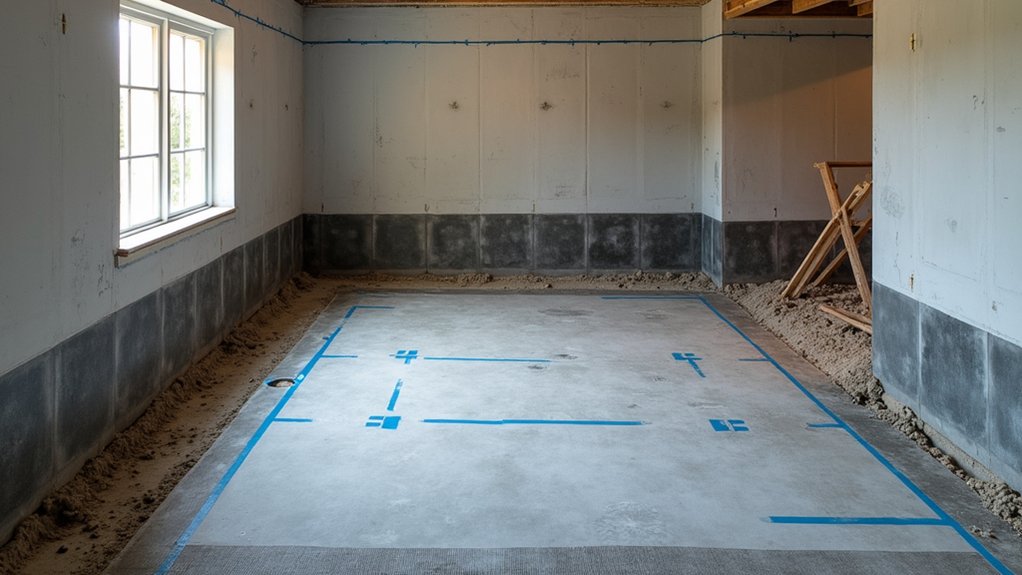
Although your framing and finishes may look impressive, they won’t deliver ROI if moisture keeps creeping through the foundation, so waterproof and seal the walls and slab like you’re protecting a long-term asset.
Start by mapping damp spots after rain, then fix cracks with hydraulic cement or epoxy injection before any wall treatment begins.
Wire-brush efflorescence, clean to bare masonry, and apply a compatible waterproof coating; don’t paint over salts or you’ll trap failure behind finishes.
At the slab, fill control-joint gaps, patch spalls, and seal the wall-to-floor cove where seepage often starts.
Your sealant application should use the right product—polyurethane or silane-siloxane—at specified bead size and cure time.
Verify adhesion and recheck for moisture within 48 hours.
Insulate and Ventilate for a Dry Finished Basement
Once you’ve locked down leaks and sealed the slab, insulate and ventilate with moisture control as the top priority so your finished basement stays comfortable and doesn’t eat your budget later through mold remediation or ruined finishes.
Choose thermal insulation that won’t trap water: rigid foam against foundation walls, sealed at seams, then a framed cavity with mineral wool if needed. Skip fiberglass directly on concrete.
Install a continuous vapor retarder only where your climate and code require it, and tape every penetration.
Pair that envelope with ventilation systems sized for the space: a dedicated dehumidifier draining to a sump or condensate pump, plus controlled fresh-air exchange if radon or odors are concerns.
Monitor humidity; keep it 40–50% to protect flooring, drywall, and ROI.
Plan the Basement Layout Around Posts and HVAC
Before you frame a single wall, map the basement’s immovable constraints—lally columns, beams, duct trunks, soffits, and the mechanical room—so your layout works with them instead of paying later to fight them.
Start with Post placement: center columns inside closets, built-ins, or stair landings, and align walls to existing beam lines so you don’t waste square footage on awkward jogs.
Box soffits only where they add value, like defining a hallway or media zone, not zigzagging across the ceiling.
For HVAC integration, keep supply and return paths short and straight, and reserve chase space early so you won’t sacrifice headroom later.
Maintain service clearance around equipment and shutoffs, or you’ll face costly rework, downtime, and warranty headaches.
Meet Code With Egress, Ceiling Height, and Access
Your layout only pays off if it also passes inspection, so check code requirements for egress, ceiling height, and access while you’re still sketching walls, soffits, and chases.
Confirm egress regulations for every sleeping room: size the opening, verify sill height, and plan window placement so wells, ladders, and exterior grading work without costly rework.
Measure finished ceiling height after you account for subfloor, drywall, and duct drops; redesign soffits early to avoid failed inspections or reduced appraisal value.
Keep mechanicals accessible with code-required clearances around the panel, furnace, and shutoffs, and don’t bury cleanouts behind built-ins.
Permit drawings that show these dimensions protect your budget, timeline, and resale ROI.
Frequently Asked Questions
How Much Does Basement Renovation Typically Cost per Square Foot?
You’ll typically pay $30–$80 per square foot, or $80–$150 for premium finishes. You’ll boost ROI by optimizing Basement lighting and using smart Insulation techniques, while budgeting contingencies to reduce contractor-change and permit risks.
Do I Need a Permit to Add a Bathroom or Kitchenette Downstairs?
Yes—you’ll almost always need permits for a basement bathroom or kitchenette; coincidentally, inspectors flag unpermitted plumbing most. You must meet Building codes and permit requirements for plumbing, electrical, vents, and drains to protect resale value.
What Flooring Options Work Best With Radiant Heat Systems?
You’ll get best ROI with tile, luxury vinyl, or engineered wood over radiant heat; they transfer warmth well and stay stable. Choose Underlayment options rated for heat, add Moisture barriers, and avoid thick carpet to cut risk.
How Long Does a Typical Basement Renovation Take From Start to Finish?
You’ll typically need 6–12 weeks start to finish. You’ll spend longer if you change ceiling height or basement lighting. You’ll protect ROI by buffering inspections, permits, and contractor delays.
Will Finishing My Basement Increase My Home’s Resale Value?
Yes, finishing your basement can boost resale value if you add livable square footage buyers trust. Use Basement insulation and Moisture barriers to reduce risk. You’ll recoup more when permits, egress, and comps support pricing.