
 By DQCS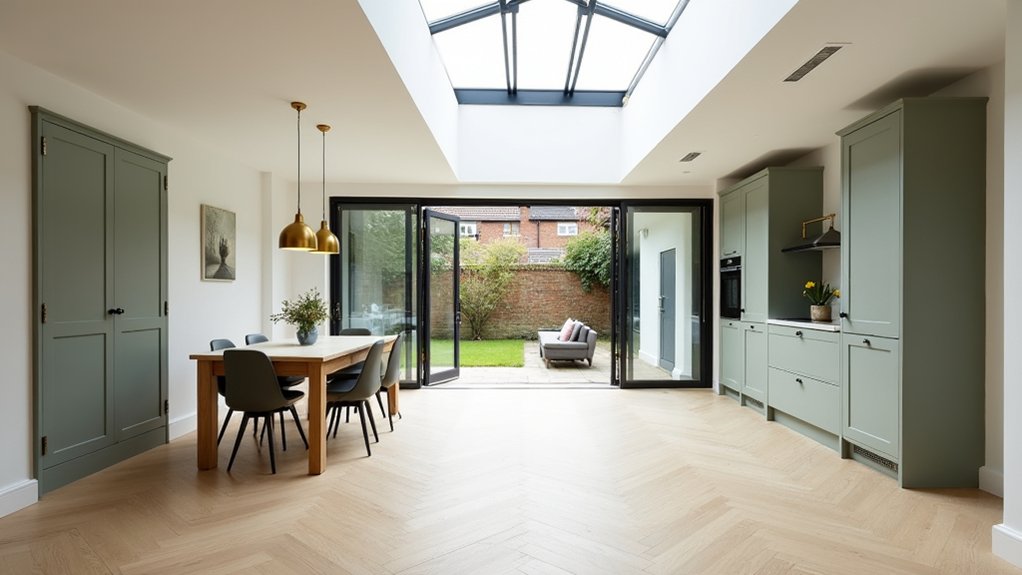
You’re starting with a classic Hitchin terrace: chopped-up rooms, a gloomy rear, and storage that never quite works. You can’t just knock walls down and hope for the best; you need a plan that improves flow, protects period details, and keeps spend where it matters. By widening the rear opening, shifting doors, and adding built-ins and a rooflight, you’ll get light and function without losing character—but the real savings come from a few less obvious moves…
The Hitchin Terrace Layout Before We Started
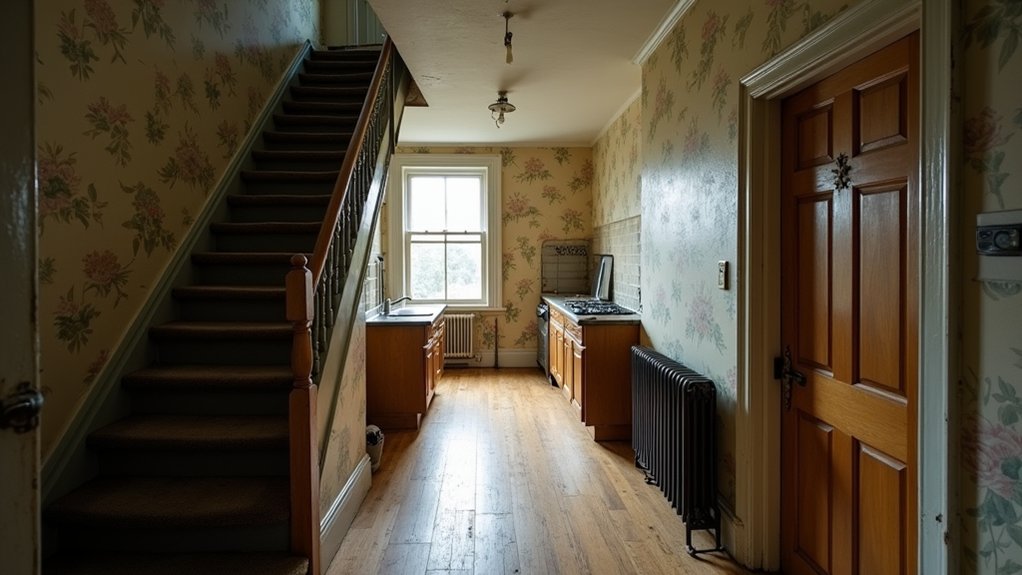
Before you spend a pound on plans or finishes, you’ve got to understand what this Hitchin market-town terrace actually gave us to work with: a narrow front-to-back footprint, two reception rooms split by a central stair, and a small lean-to kitchen at the rear that blocked light and wasted storage. So every later decision had to justify its cost in better flow, usable space, or natural daylight.
You walk in to a tight hallway with a front room that feels generous but gets boxed in by furniture, then a darker rear reception that borrows light.
Upstairs, you deal with a compact landing, two small bedrooms, and a bathroom squeezed over the lean-to.
You note original architectural details—skirtings, picture rails, fireplaces—worth careful historical preservation, because replacing them would burn cash without adding value.
What We Changed: New Flow, Storage, Key Moves
You rework the ground-floor flow so every step earns its keep, cutting wasted corridors and making the kitchen, dining, and living zones connect without costly structural drama.
You prioritise a few high-impact moves—widened openings, smarter door swings, and sightlines that pull light through—because they deliver the best value per pound.
You then lock in built-in storage where it replaces bulky furniture: under-stairs cupboards, full-height joinery, and bench seating that hides the everyday clutter.
Reworked Ground-Floor Flow
Although the terrace footprint didn’t change, we reworked the ground-floor flow so every square metre earns its keep: clear sightlines from front door to garden, a tighter route past the stairs, and storage built into the “dead” zones that used to swallow time and clutter.
You start by moving pinch points, not walls: shift the dining zone closer to the kitchen, keep a straight circulation line, and let doors swing without clipping chairs. With smarter furniture arrangement, you choose one generous sofa over two small pieces, then float it to widen the walk-through.
You’ll spend less on joinery by keeping plumbing where it was and improving how you use the room instead. Add lighting enhancements—two well-placed ceiling points and wall washers—to pull you through the plan and make it feel longer, brighter, and calmer.
Built-In Storage Solutions
Once the circulation line ran clean from front door to garden, the next best-value upgrade was to pack storage into every awkward margin the terrace already had. You stop paying for extra furniture and instead make each niche work harder: under-stair drawers for coats and shoes, a slim broom cupboard in the chimney recess, and a bench with lift-up lids by the back door.
You keep costs controlled by standard carcass sizes, then spend where it shows: Custom cabinetry fronts matched to your wall colour, soft-close hinges, and a durable laminate interior. You add Hidden compartments for chargers and routers so surfaces stay clear.
In the kitchen, you run tall units to the ceiling and fit a pull-out larder, cutting waste and boosting daily efficiency.
Opening Up Our Hitchin Terrace, Keeping Character
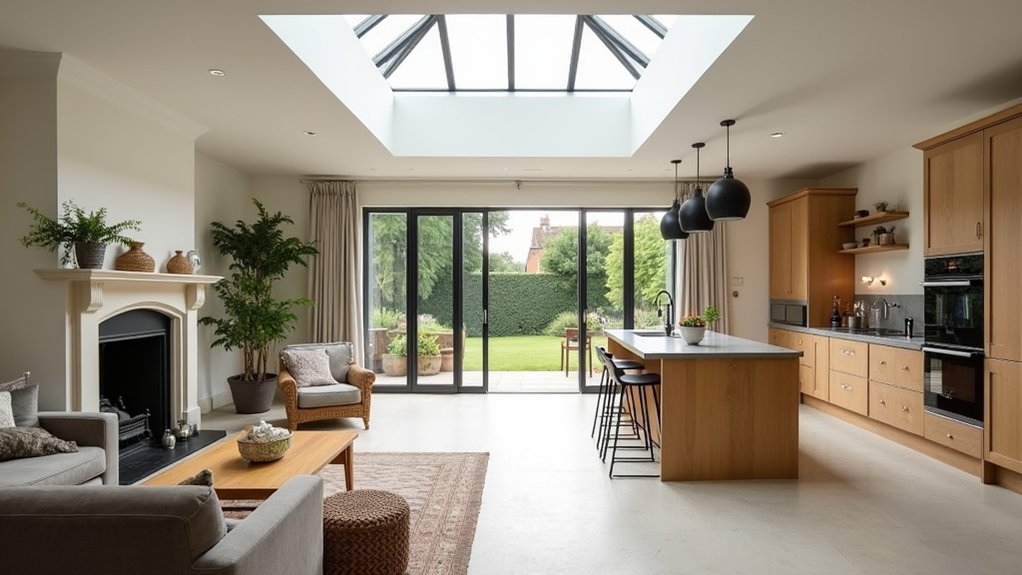
Before a single wall came down, we mapped out how to open up our Hitchin terrace for better light and flow without paying for mistakes—or stripping out the period charm that gives a market-town home its value.
You start by listing what must stay: chimney breast, original skirting, ceiling roses, and the front room proportions.
You then open the plan where it counts, not everywhere. You keep structural changes minimal, sizing openings to standard lintels and reusing bricks and boards so you don’t buy twice.
For garden integration, you align the new opening with the existing path and keep thresholds simple to avoid drainage surprises.
For facade preservation, you keep the street elevation untouched, match mortar, and repair sash details instead of replacing them.
You document every junction, so trades price accurately.
Our Natural-Light Strategy for a Dark Terrace
Opening up the layout fixed the flow, but it didn’t automatically fix the gloom that a north-facing Hitchin terrace can trap in the middle of the plan, so we set a light-first brief that every trade could price and build to.
You start by mapping daylight routes room by room, then you spend where it counts: enlarging the rear opening and adding a rooflight over the darkest pinch point.
You keep costs down by holding structural changes to one steel line and standard rooflight sizes. You prioritise Window placement over bigger glazing everywhere: align openings to sightlines, keep head heights consistent, and avoid deep reveals that steal Natural light.
You specify pale ceilings early so the plasterer budgets properly, and you demand clean, square openings so trim doesn’t nibble the aperture.
Finishes for a Hitchin Period Terrace (Modern, Warm)
How do you keep a Hitchin period terrace feeling modern and warm without spending on “statement” materials that don’t earn their keep? You start with a tight color palette: soft off-whites on walls, warm greys on trim, and one deeper tone (olive or ink) for built-ins. That consistency makes small rooms read bigger and cuts repainting costs later.
Then you get ruthless about material selection. Choose mid-range engineered oak for durability and easy repairs, and pair it with matte porcelain in wet zones for low maintenance. Use plain shaker fronts, but spend on solid handles and quality hinges—they’re what you touch daily.
Keep grout mid-tone, pick washable eggshell, and let lighting and textiles add warmth.
Hitchin Terrace Renovation Surprises (What We’d Change)
Although you can price a Hitchin terrace renovation down to the last tile, the real budget swings come from the surprises you didn’t allow for—and a few “perfectly fine” choices you’ll wish you’d upgraded.
You’ll likely uncover damp behind plaster, uneven joists, and tired wiring, so ring-fence 10–15% for opening-up works and upgrade electrics early to avoid double labour.
Don’t skimp on insulation: add loft and party-wall treatments, and choose better glazing for energy efficiency that pays back in bills and comfort.
You’ll also regret delaying garden landscaping; level changes, drainage, and paving bases cost more once access gets tight.
If you change anything, you’ll specify quieter extractor fans, more sockets, and durable floor finishes that reduce maintenance.
Frequently Asked Questions
How Much Did the Hitchin Terrace Renovation Cost Overall?
You’ll spend about £120,000 overall. You’ll get a clear cost breakdown: £70k build, £25k kitchen/bath, £15k electrics/plumbing, £10k finishes. You’ll follow a 20-week renovation timeline to protect value.
How Long Did the Renovation Take From Start to Finish?
You’ll typically take 16–20 weeks from start to finish. Design challenges can add 2–4 weeks, while smart Material choices keep delays and costs down. You’ll save by sequencing trades tightly and locking lead times early.
Did You Need Planning Permission or Listed-Building Consent in Hitchin?
You didn’t need planning permission unless you altered the façade or extended, but you’d need listed-building consent if it’s listed. You still must meet building regulations; that paperwork protects budget, boosts property valuation, avoids fines.
Which Builders, Architects, or Trades Did You Use Locally?
You’ll use a Hitchin-based architect, a vetted main builder, and specialist electricians, plumbers, and joiners. You’ll prioritise local craftsmanship, compare three quotes, and guarantee they handle building permits, inspections, and snagging.
How Did You Manage Living Arrangements During the Renovation?
You won’t blow the budget: you stayed put, camped in one sealed-off room, and rotated spaces as trades moved. You managed living arrangements with strict renovation logistics—portable hob, mini-fridge, weekly deep cleans, clear schedules.