
 By DQCS
If you’re gutting a 1970s ranch and your furnace is short-cycling while gas bills spike, you can turn the renovation into a high-ROI heating upgrade. You’ll start by confirming code and venting compliance, then align equipment choice, duct or piping fixes, and access panels with your framing and drywall schedule. You’ll price permits, inspections, and lead times before walls close, because one missed step can force costly rework—especially when you size the system wrong…
Is Your Heating System Due for an Upgrade?

If you’re wondering whether it’s time to upgrade, start by looking at performance, cost, and compliance—not just system age. Track comfort complaints, uneven temperatures, short cycling, or long runtimes; they signal declining output and higher wear.
Compare utility bills to similar buildings and normalize for weather—rising spend often means lost Energy efficiency. Calculate maintenance frequency and parts availability; repeated service calls quickly erase any “keep it running” logic and reduce cost savings.
Next, check regulatory risk: verify venting, combustion air, carbon monoxide safeguards, and equipment clearances meet current code. Confirm the system supports required controls, such as programmable setbacks and zoning, where applicable.
If you can’t document efficiency ratings, safety testing, and permits, you’re carrying liability and paying to heat waste.
Map Your Renovation Plan Around the Heating Upgrade
Map your renovation plan around the heating upgrade so you don’t pay twice for rework or lose efficiency to a mismatched layout.
Coordinate HVAC design with wall moves, room uses, and permit/inspection milestones. Then sequence demolition to open chases before finishes go in.
Schedule ductwork and equipment placement early so clearances, fire-blocking, and code-required access are built in—not patched later.
Coordinate HVAC With Layout
Before you lock in walls, ceilings, or room sizes, align your renovation layout with the heating upgrade so you don’t pay twice for rework. Place mechanical closets, chases, and interior soffits where they shorten runs and keep service access clear, boosting ROI and code compliance.
Coordinate supply and return locations with furniture plans, doors, and lighting so airflow isn’t blocked and HVAC aesthetics stay clean. Use room-by-room load calculations to right-size equipment and decide where zoning makes sense; you’ll protect energy efficiency and avoid comfort complaints.
Confirm clearances around air handlers, boilers, or heat pumps, and leave space for future filter changes and condensate routing. Check local requirements for combustion air, venting, and fire-rated penetrations before finalizing drawings, and document decisions for permits and inspections.
Schedule Demolition And Ductwork
Once your heating design is set, lock in a demolition and ductwork schedule that opens walls and ceilings only when crews can immediately run trunks, branches, and returns. This sequencing cuts rework, shrinks labor hours, and keeps patching costs from eating your HVAC budget.
Tie demolition scheduling to permit inspections so you don’t cover fireblocking, smoke-seal details, or required duct supports before the inspector signs off.
During ductwork planning, stage materials on-site, confirm chase sizes, and mark registers before rough framing changes. Schedule pressure testing and duct leakage verification (where required) before insulation and drywall, so fixes stay cheap.
Coordinate electrical and plumbing offsets the same day to avoid conflicts. You’ll finish faster, reduce callbacks, and protect airflow performance that drives comfort and energy ROI.
Choose the Right Heating System Replacement
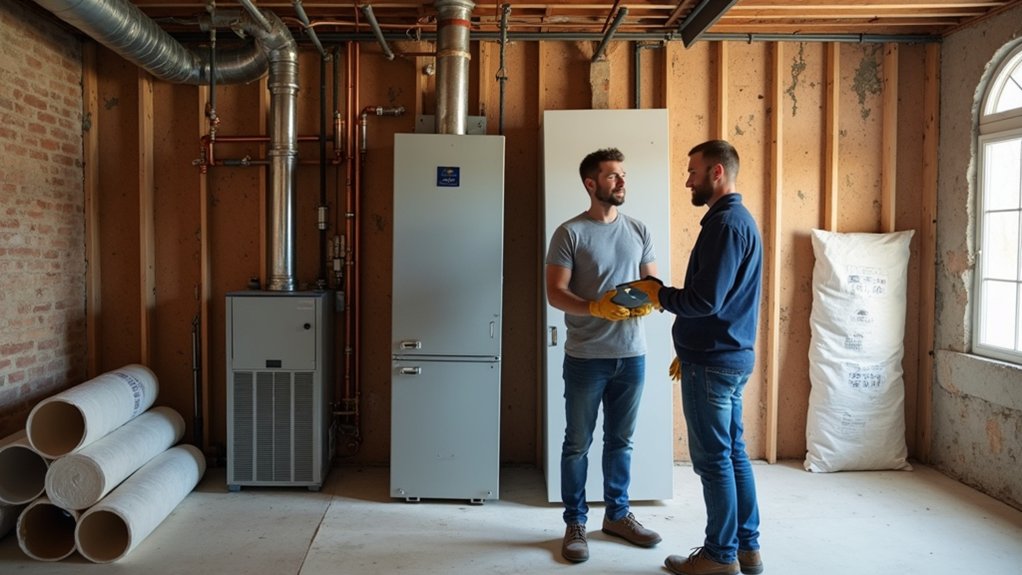
How do you pick a replacement heating system that pays you back instead of just costing you more upfront? Start with a load calculation so you don’t oversize equipment and waste money.
Compare options by total cost of ownership: installed price, projected Energy efficiency, maintenance, and expected lifespan.
If you’ve got access to low-carbon electricity, an air-source or ground-source heat pump can cut operating costs and environmental impact, especially with smart thermostats and zoning controls.
If gas is cheapest, choose a high-AFUE condensing furnace or boiler and verify venting requirements.
Check local code, permitting, and refrigerant rules, and confirm your utility’s rebate list before you buy.
Finally, require AHRI-rated matches and a written commissioning plan to protect performance and payback.
Fix Ducts and Piping While Walls Are Open
While the walls are open, you’ve got the cheapest window to fix the hidden problems that quietly drain ROI—leaky, undersized ducts, poorly pitched condensate lines, uninsulated hydronic runs, and aging gas piping. Seal duct joints with mastic, resize trunks where rooms starve, and verify returns meet code-required airflow.
Schedule duct cleaning after demolition dust, then protect runs before the system’s restarted.
On piping, correct slopes on condensate drains, add cleanouts, and pressure-test gas lines per local requirements before you close anything up. Upgrade shutoff valves where access will disappear.
Don’t skip pipe insulation on hot-water supply/return and any lines in unconditioned bays; it cuts standby loss and helps prevent freezing. Photograph inspections and keep permits handy for resale and warranty documentation.
Add Zoning and Smart Controls During Renovation
While you’ve got walls open, you can plan a multi-zone layout so you’re only heating occupied areas, cutting runtime and boosting ROI.
You’ll place dampers or zone valves and run the right control wiring now, avoiding costly retrofits and keeping the install aligned with local code and equipment requirements.
Then you’ll integrate smart thermostat controls to schedule setbacks, balance comfort, and document savings with clear usage data.
Plan Multi-Zone Layout
Where do you actually need heat—and when? Map rooms by use, sun exposure, insulation level, and occupancy so you’re not paying to heat empty space. During renovation, you can route new ducts, hydronic loops, or mini-split heads to match those patterns and capture real zoning advantages.
Group spaces with similar loads (bedrooms together, kitchen/living together, basement separate) to reduce short cycling and improve comfort.
Plan multi zone controls around code realities: keep required temperature minimums for habitable rooms, maintain safe clearances at registers/radiators, and preserve combustion-air and venting paths if any legacy equipment remains.
Leave access for future dampers/valves, add return-air paths, and balance airflow/water flow now so each zone performs without oversizing.
Integrate Smart Thermostat Controls
Once you’ve mapped zones that match how you actually use the house, make the controls just as intentional by integrating smart thermostats and zoning hardware during the renovation. Run low-voltage wiring and place sensors while walls are open, then pair motorized dampers or zone valves with a central controller so each area heats only when needed.
Choose a smart thermostat that supports multi-zone scheduling, remote setpoints, and boiler or heat-pump compatibility to avoid costly change orders later. Lock in ROI by enabling setback routines, occupancy-based control, and supply-temperature optimization; these features typically cut runtime and boost energy efficiency without sacrificing comfort.
Confirm your installer meets local electrical and HVAC code, and document commissioning settings for rebate eligibility and inspections. Also label circuits and dampers.
Right-Size the Upgraded Heating System for Comfort
Even if you’re upgrading to a higher-efficiency unit, you’ll only get the comfort and ROI you paid for if you size it to your home’s actual heat loss instead of the old equipment’s nameplate. Ask for a room-by-room Manual J load calculation, then match equipment with Manual S, so you avoid short-cycling, noise, and uneven temps that kill Energy efficiency.
Right-sizing also protects system compatibility: your ductwork, hydronic loop, radiators, and electrical service must support the output, airflow, and controls you’re installing. If you’re tightening the envelope during renovation, re-run the load—insulation and air-sealing can justify smaller equipment and lower operating costs.
Verify the design meets local code requirements for ventilation and combustion safety, and confirm the unit’s modulation range can cover mild days without cycling.
Budget, Permits, and Contractor Timing for Upgrades
After you’ve right-sized the equipment for your home’s actual heat loss, lock in the dollars and the schedule so the upgrade doesn’t stall at the permit counter or during peak-season lead times. Build a budget that separates must-haves (equipment, controls, venting, electrical) from optional comfort add-ons, and factor cost considerations like panel upgrades, asbestos abatement, crane fees, and disposal.
Ask for itemized bids so you can compare efficiency, warranty, and labor—not just sticker price.
Next, confirm permit requirements early: HVAC changeouts often trigger mechanical, electrical, gas, and sometimes zoning approvals. Schedule inspections into your timeline, and don’t close walls until rough-in passes.
Book your contractor before cold season, order long-lead parts up front, and align rebates with invoice dates.
Frequently Asked Questions
How Long Will My Home Be Without Heat During the Upgrade?
You’ll typically go without heat 1–3 days; complex ductwork or permit delays can stretch to a week. You’ll recover comfort faster by preordering equipment, scheduling inspections, and adding Smart thermostats for Energy efficiency ROI.
Can I Upgrade the Heating System Without Replacing Existing Radiators?
Yes—you can, if you confirm radiator compatibility and choose suitable heating system types. You’ll boost ROI by reusing emitters, but you must size outputs, balance flows, and meet boiler, heat-pump, and building-code requirements.
Will a New Heating System Improve Indoor Air Quality or Reduce Dust?
Yes—you’ll often see better air quality and less dust. Like upgrading from a clogged coffee filter, Air filtration traps particulates; one MERV-13 filter can remove ~85% of 1–3µm particles, boosting dust reduction and code compliance.
What Rebates or Tax Credits Are Available for Heating Upgrades This Year?
You’ll typically find federal incentives like the Energy Efficient Home Improvement Credit (up to 30% caps) and local utility rebates for heat pumps/boilers; verify eligibility on IRS/DSIRE, meet energy efficiency rules, keep invoices.
How Do I Maintain and Service the New System After Installation?
You maintain it by following manufacturer Maintenance tips, changing filters, keeping vents clear, and logging performance. Stick to Service schedules for annual inspections, combustion checks, and refrigerant tests to protect warranties, meet codes, and cut costs.