
 By DQCS
If you’ve ever hosted eight people in a 10×12 dining room and watched everyone squeeze past chair backs, you know the layout costs you comfort and time. You’ll get better ROI when you measure the room, map traffic flow, and center the plan around the table, then size a dimmable fixture to match. Add layered lighting and reflective finishes to boost daylight without major structural spend—but one common choice can undo all of it…
Measure Your Dining Room and Map Traffic Flow

Before you buy a new table or plan lighting upgrades, measure your dining room and map how people actually move through it. Use a laser measure, note wall lengths, window and door swings, and HVAC returns.
Then trace the real paths: kitchen-to-dining, dining-to-patio, and service runs from buffet to seats. Mark pinch points where chairs snag or guests hesitate.
This data drives ROI because it prevents costly reorders, reduces wasted square footage, and helps you choose lighting positions that won’t be blocked by people or doors.
For Furniture arrangement, sketch scaled rectangles for major pieces and keep clearances consistent.
For Traffic optimization, target smooth 36-inch lanes and wider turns at entries. Validate with tape on the floor before you buy.
Renovate the Dining Room Layout Around the Table
Once you’ve mapped clearances and traffic lanes, lock the layout around the table because it’s the highest-impact anchor for comfort, resale appeal, and lighting performance. Center it to the room’s visual axis, not necessarily the footprint, so sightlines from entries feel intentional.
Prioritize consistent chair pull-back space on all sides; buyers notice pinch points immediately. Choose a table shape that matches the room’s proportions and traffic: rectangles suit long rooms, rounds soften tight corners and improve circulation.
Then build your furniture arrangement outward—sideboard on the longest wall, bar cart in a dead corner, and keep serving paths short. Use décor enhancement strategically: a rug that frames the table, mirrored art to bounce light, and restrained accessories that don’t clutter the perimeter.
Choose the Right Dining Room Light Fixture Size
To get lighting that looks high-end and performs like it, you’ll measure both the table and the room before you buy.
You’ll match the fixture’s diameter or length to the table so the light reads centered, proportional, and resale-friendly.
Then you’ll set the hanging height for clean sightlines and even illumination—no glare, no wasted watts.
Measure Table And Room
Because the right fixture size depends on proportions, you’ll get the best ROI by measuring your table and the room first—then letting those numbers drive the light choice instead of guesswork.
Start with the table: record length and width, plus clearance to walls and traffic paths.
Then measure the room’s length, width, and ceiling height to prevent an oversized piece that crowds sightlines or an undersized one that wastes lumens.
Note window placement and any soffits or beams that limit hanging height.
Capture finish cues too—Table materials and Wall colors affect how much light bounces or gets absorbed, which changes perceived brightness and may justify more output without buying a bigger fixture.
Photograph the space and keep measurements handy for faster pricing comparisons and fewer returns.
Match Fixture To Table
With your table and room measurements in hand, you can size the dining fixture to the tabletop—not guess—and avoid paying for a piece that looks off-scale or underperforms.
Aim for a diameter about one-half to two-thirds of the table’s width; this keeps light centered on place settings while preserving sightlines across the table.
For rectangular tables, choose a linear pendant or multi-light bar that spans roughly one-half to three-quarters of the table length, so coverage reaches end seats without wasting lumens on walls.
Match fixture styles to function: open frames spread light broadly, while shades concentrate it for intimate meals.
Consider material choices as performance levers—clear glass boosts brightness, metal directs it downward, and fabric softens glare for better comfort.
Set Proper Hanging Height
Once you’ve nailed the fixture’s scale, hanging height becomes the make-or-break detail that determines whether the room feels polished or problematic. Target 30–36 inches from tabletop to the bottom of the light for standard 8-foot ceilings; add about 3 inches per extra foot of ceiling height to keep glare down and sightlines open.
Lock in fixture positioning by centering over the table, not the room, so the investment reads intentional even after furniture shifts. For rectangular tables, align the fixture’s length with the table’s long axis and keep it inside the table edge to prevent harsh shadows.
Use a dimmer and test at dinner-chair eye level before final wiring—tiny tweaks protect comfort and resale appeal.
Layer Dining Room Lighting for a Balanced Glow
Even if you’ve upgraded furniture and finishes, your dining room won’t feel “done” until you layer the lighting. Start with ambient layers that eliminate shadows and make the room photograph well—an instant resale win. Combine a dimmable overhead statement with perimeter sources so the table stays highlighted while walls and corners feel intentionally bright, not gloomy.
Dial in fixture placement to support your layout: center the primary light over the table, then add secondary lights that wash artwork, drapery, or built-ins without glare. Choose matched color temperature (2700K–3000K) and high CRI bulbs so wood tones and food look rich.
Put each layer on separate controls to shift from weekday dining to entertaining, without rewiring later.
Add Task Lighting for Serving and Cleanup
Although a chandelier sets the mood, task lighting is what makes serving, carving, and post-dinner cleanup feel effortless—and it’s a practical upgrade buyers notice.
Add dimmable wall sconces near a buffet, or a slim, high-CRI linear fixture over a sideboard so platters read true and spills don’t hide.
Aim for 300–500 lux on work zones, with warm 2700–3000K lamps that still preserve Ambient ambiance.
If you’ve got built-ins, install LED tape in an aluminum channel under shelves to eliminate glare and hotspots.
Put everything on separate switches so you can shift from dinner to cleanup fast without over-lighting the whole room.
Choose fixtures that double as decorative accents to boost perceived value without overspending.
Use Color and Reflective Finishes to Brighten
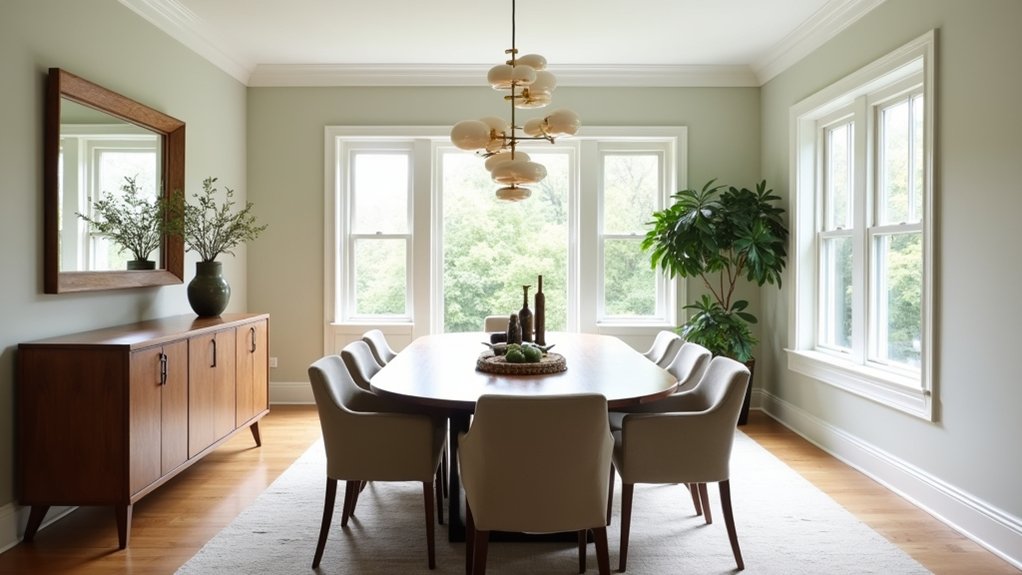
After you’ve layered your lighting controls for dinner and cleanup, you can make every fixture work harder by boosting the room’s bounce with color and reflective finishes. Choose a light, warm wall paint (LRV 60–75) to raise ambient brightness without adding wattage.
Add color accents in art, upholstery, or a rug so the space reads intentional, not washed out, which helps resale appeal.
Prioritize reflective surfaces where they pay back: a satin or eggshell sheen, a glass-front cabinet, a polished stone buffet top, or a well-placed mirror that returns chandelier light across the table.
Keep metals consistent—brushed brass or nickel—so highlights look premium.
These upgrades improve perceived square footage and reduce lighting spend over time.
Avoid Common Layout and Lighting Renovation Mistakes
When you renovate a dining room, a few predictable layout and lighting missteps can erase your ROI fast—think a chandelier that’s off-center to the table, switches that don’t match how you use the room, or clearances that make seating feel cramped.
Center fixtures on the table, not the room, and keep 36 inches minimum behind chairs for smooth circulation buyers notice. Put dimmers at main entries and add a three-way if you have multiple access points.
Layer lighting: ambient, a focused pendant, plus wall sconces to kill shadows. Don’t skimp on CRI; 90+ makes finishes and food look premium in listings.
Handle Artwork placement at eye level with predictable sightlines.
Choose Window treatments that clear trim and stack back fully to maximize daylight.
Frequently Asked Questions
What Permits Are Needed for Rewiring or Moving Dining Room Lighting?
You’ll usually need an electrical permit to rewire or relocate fixtures; panel upgrades may require additional permits. Follow local Electrical codes and the Permit process, schedule inspections, and you’ll avoid rework, delays, and costly failed closings.
How Much Does a Dining Room Layout and Lighting Renovation Typically Cost?
You’ll typically spend $2,000–$15,000, depending on Furniture placement changes, lighting upgrades, and color schemes. You’ll boost resale appeal by improving flow and ambiance; prioritize fixtures, minor electrical, and paint for best ROI.
Should I Hire an Electrician, or Can I Install Fixtures Myself?
Hire an electrician for new circuits, panel work, or code-required permits; you’ll protect resale value and avoid rework. For swaps, you can do DIY lighting, but schedule an electrician consultation to confirm load, grounding, and placement.
How Long Does a Typical Dining Room Renovation Project Take?
You’re looking at 2–6 weeks, unless your “quick refresh” morphs into a saga. Lock Furniture arrangement and Lighting design early, or you’ll burn budget on rework, delays, and poor ROI.
How Can I Soundproof a Dining Room During a Renovation?
You can soundproof your dining room by sealing gaps, adding insulation, and using decoupled drywall. Choose soundproofing techniques like resilient channels and acoustic panels, plus noise reduction materials like mass-loaded vinyl for measurable ROI.