
 By DQCS
If you want a new-build that feels bigger and costs less to run, you need to plan daylight like an asset. You’ll start with orientation, then place living spaces on the sunniest side and use glazing that pulls light deep into the plan without overheating. You’ll keep circulation tight, zone noise away from bedrooms, and use ceilings and finishes to bounce light further. The tricky part is getting privacy and glare control right without killing the impact…
Orient Your New Build for All-Day Light
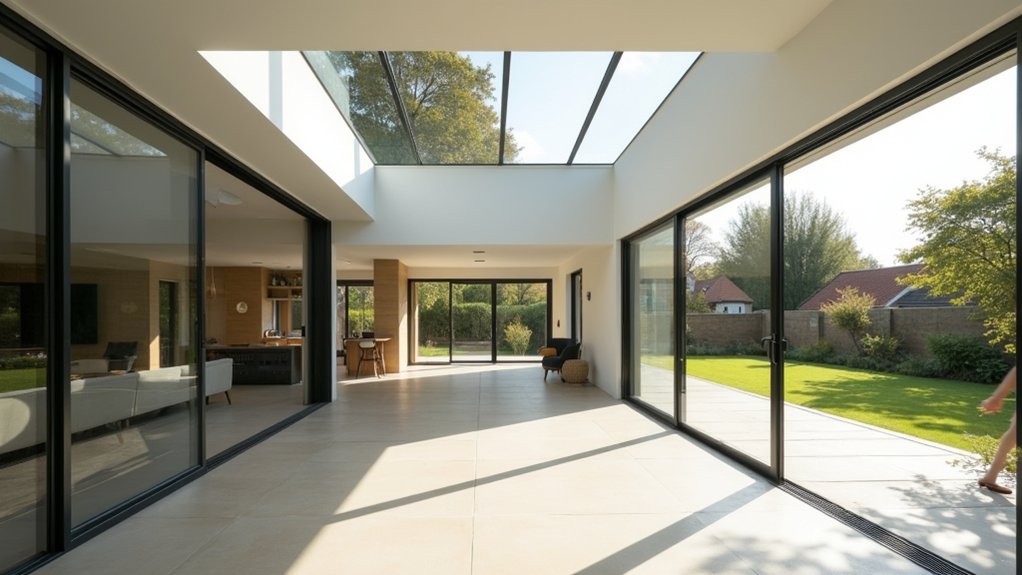
If you get the orientation right before you pour the slab, you’ll lock in free daylight and lower operating costs for decades. Start by mapping the sun path on your site plan and checking overshadowing from trees, neighbours, and future extensions.
Rotate the footprint so your longest façade faces the best daily light, then size and position glazing to capture it without glare. Use eaves, pergolas, or external screens to block high summer sun while admitting lower winter light, reducing HVAC demand.
Keep window head heights consistent to spread light deeper and cut artificial lighting hours. Back up the plan with interior color schemes that bounce light, and furniture placement that keeps sightlines clear of windows.
Measure lux levels in the model before you build.
Place Key Rooms Where the Sun Is
Because you’ll spend the most time in a few “core” spaces, place those rooms where they can bank the best sun and pay you back every day in comfort and lower energy use. Put your kitchen, living area, and main bedroom on the sunniest side so daylight replaces electric lighting and passive warmth trims heating demand.
Treat Window placement like an investment: size and position glazing to pull light deep into the room, then control glare with overhangs or external shading. Aim for morning light in bedrooms for easier wake-ups, and stronger afternoon light where you relax and entertain.
If you want an Indoor garden, site it where it gets consistent sun; you’ll reduce grow-light costs and keep plants healthier year-round.
Plan a Space-Smart New-Build Layout
While it’s tempting to add square footage “just in case,” you’ll get a better return by designing a layout that makes every room earn its keep through multi-use spaces, short circulation paths, and storage placed exactly where you need it.
Start with a measured plan: minimise hallways, align doors to reduce dead corners, and keep high-traffic routes straight. Sketch furniture arrangement early so you don’t waste metres on unusable wall runs or awkward clearances; leave 900–1,000mm for main walkways and 600mm beside beds and wardrobes.
Build in storage solutions where they cut daily friction: an entry bench with drawers, tall pantry units, under-stair cupboards, and a utility niche near the kitchen. You’ll save on build costs and boost resale by making rooms feel bigger.
Use Open-Plan Living With Quiet Zones
An efficient layout doesn’t stop at trimming hallways—it also shapes how sound and privacy work day to day, especially in open-plan spaces. To keep the resale-friendly openness while protecting focus, build in quiet zones from the start. Use zoning strategies like a small snug off the main living area, a pocket office under the stairs, or a reading bay beside storage.
Place noisy functions—kitchen, laundry, kids’ play—at one end, and calm functions at the other, so circulation doesn’t cut through work or rest areas.
Improve Acoustic privacy with solid-core internal doors, acoustic plasterboard to key partitions, and soft finishes like rugs and lined curtains. Add built-in benches or bookcases as sound buffers that double as storage, boosting ROI per square metre.
Choose Glazing by Size, Type and Position

If you choose your glazing with size, type, and position in mind, you’ll control heat loss, overheating, glare, and privacy without paying for unnecessary square metres of glass.
Match window area to room use: larger panes where you spend daytime hours, smaller where storage or circulation dominates. Face big glazing to the best views and stable light; limit west-facing glass to cut afternoon heat gain.
Specify double glazing with low‑E coatings and warm-edge spacers to reduce bills and condensation risk.
Use opening lights high and opposite each other to boost cross-ventilation without sacrificing wall space for furniture.
Add window tinting or solar-control glass on bright elevations to protect finishes and reduce cooling loads.
Place sills at desk height for usable walls, and keep head heights consistent for cheaper lintels.
Add Rooflights and Lightwells to Dark Spots
Place rooflights where they’ll push daylight deepest into your plan—over stair cores, hallways, and north-facing zones—so you cut lighting loads and lift usable space value.
Shape lightwells with high-reflectance finishes, tight reveals, and the right depth-to-width ratio to spread light evenly instead of creating bright “hot spots.”
Control glare and overheating with orientation, solar-control glazing, external shading, and openers for purge ventilation so you keep comfort high and running costs low.
Position Rooflights Strategically
Because daylight falls off fast once you move away from windows, you’ll get the best ROI by positioning rooflights and lightwells directly over the home’s darkest, most-used zones—hallways, stairwells, landings, internal bathrooms, and deep-plan kitchens.
Start with a lighting map: mark spaces that need daytime task light, then size openings to match function and ceiling height.
Prioritise central circulation routes first; they’re used all day and set the home’s perceived brightness.
For kitchens, place rooflights over prep runs or islands to cut electric lighting hours.
In bathrooms, align them above the shower or vanity for glare-free daylight.
Treat skylight placement like furniture planning: centre it where people stand, not where structure’s convenient.
Coordinate rooflight design with trusses, services, and ventilation paths early.
Design Effective Lightwells
Once you’ve picked the best rooflight locations, the next ROI lever is the lightwell that carries that daylight into the room below. Treat it like a duct for light: keep it straight, minimise bends, and size it generously to spread illumination wider.
In your lightwell design, flare the sides where possible, and use smooth, high-reflectance linings (light plaster, pale paint, or reflective boards) to bounce light deeper.
Detail junctions tightly so you don’t lose ceiling height or create awkward boxing that wastes area.
Coordinate structural openings early, then align the well with key dark zones—stairs, landings, hallways, and internal bathrooms.
During skylight installation, specify preformed insulated upstands and airtight membranes so the well stays crisp, clean, and easy to decorate.
This boosts perceived space without adding floor area.
Manage Glare And Heat
Even if you’ve nailed the rooflight position and built a high-performing lightwell, you’ll only keep the uplift if you control glare and solar gain so the space stays comfortable year-round. Specify low‑g, high‑light transmittance glazing to cut heat without killing daylight, then add layered control: internal blinds for fine-tuning and external shading devices for peak summer sun.
Use window tinting selectively on south- and west-facing rooflights to reduce overheating and protect finishes; choose neutral tints to avoid colour cast.
Detail deep reveals or baffles at the lightwell head to soften hotspots and spread light. Add ventilation—trickle vents or an opening rooflight—to purge heat quickly.
You’ll protect comfort, reduce cooling loads, and avoid expensive retrofits later.
Control Glare, Privacy and Overheating
If you don’t manage solar gain and sightlines early, your new build can end up with washed-out rooms, uncomfortable hotspots, and overlooked living areas that cost money to fix later. Start by mapping where sun hits glazing by hour and season, then pair it with the right shading devices: deep eaves for high summer sun, external blinds for west-facing glare, and adjustable louvers where you need flexibility.
Protect privacy without killing daylight by specifying Window treatments that modulate views, not block them: top-down/bottom-up blinds, sheer roller layers, or integral blinds in high-traffic rooms. Use obscure glass for bathrooms and street-facing sidelights, and place openings higher on boundary walls.
Finally, reduce overheating with low-g-value glazing and cross-vent paths, cutting cooling loads and improving resale appeal.
Boost Light With Ceilings, Sightlines and Finishes
Good solar control stops glare and overheating, but you’ll still leave value on the table unless the interior can carry daylight deep into the plan. Start with ceilings: raise them where you can, or use partial double-height voids over stairs and landings to push light further. Specify bright, matte Ceiling finishes (high LRV white) to bounce light without hotspots.
Keep sightlines open: align doors, widen internal openings, and use glazed or pocket doors so daylight passes room to room. Put tall joinery on darker walls, not opposite windows.
Choose light reflective surfaces strategically—pale floors, satin walls, and low-iron glass—while avoiding mirror-like gloss that shows every mark. Your reward: fewer fittings, lower energy use, and rooms that feel bigger, raising resale appeal.
Frequently Asked Questions
How Do I Estimate the Budget for Maximising Space and Natural Light?
Start with Cost estimation: price layout changes, glazing, skylights, and structural work. Set Budget allocation by ROI—prioritise openings, insulation, and efficient plans. Get three bids, add 10–15% contingency, then track unit costs.
Do I Need Planning Permission for Rooflights or Large Glazing Changes?
You might not need planning permission, but you must follow rooflight regulations and the glazing approval process. Like letting daylight tiptoe in, check permitted development, conservation limits, structural impacts, and ROI from energy savings.
Which Professionals Should I Hire to Design a Light-Filled, Space-Smart Home?
You should hire an architect, structural engineer, and lighting designer; add an interior designer and energy consultant. They’ll optimize interior lighting and structural considerations, coordinate approvals, prevent costly rework, and deliver layouts that boost resale value.
How Can I Improve Acoustics in Open-Plan Spaces Without Blocking Light?
Like taming echoes in a glass canyon, you’ll boost open-plan acoustics by adding Acoustic panels on ceilings/walls and layering Soundproof curtains on tracks. You’ll cut reverb, preserve daylight, and raise comfort—high ROI.
What Are the Best Maintenance and Cleaning Options for High-Level Glazing?
You’ll get best results by specifying self-cleaning glass, safe access points, and extendable poles with purified-water Cleaning techniques. Set quarterly Maintenance schedules, inspect seals annually, and budget for occasional rope-access pros to protect warranties and reduce costs.