
 By DQCS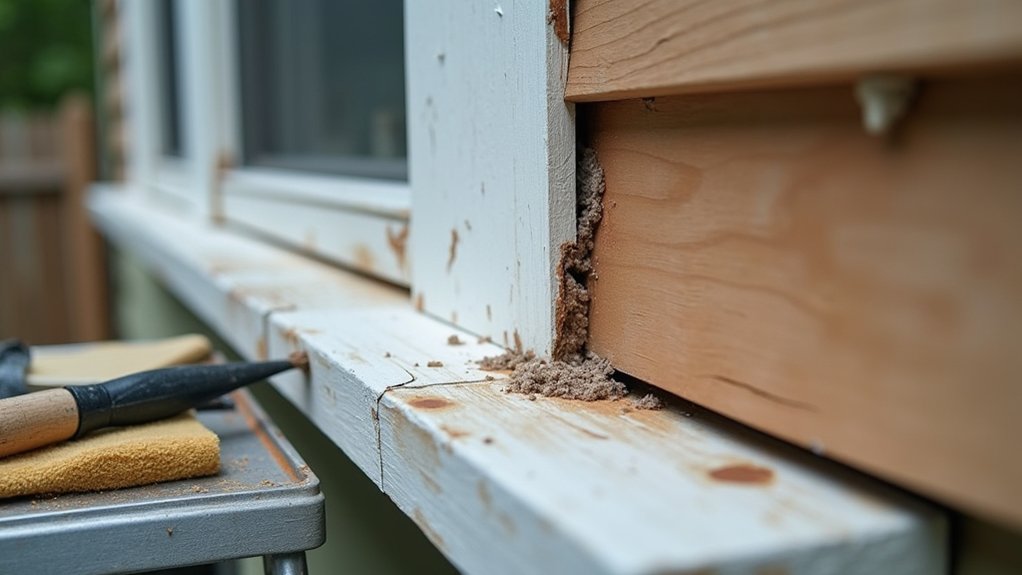
You can’t get a long-lasting exterior paint job if you skip the repair work, and that mistake costs you twice. Start by checking every board and joint for rot, soft spots, cracked paint, and open seams. Strip what’s loose, sand to a firm edge, and fill or replace damaged wood before you prime. Seal gaps with exterior caulk, then paint two solid coats. The key steps that save the most time and money come next…
Inspect Weathered Exterior Woodwork for Rot

Before you spend money on primer and paint, inspect every exposed wood surface for rot so you don’t seal in damage and have to redo the job later. Walk the perimeter and focus on high-risk zones: end grain, joints, trim bottoms, window sills, and any area near gutters or splashback.
Press with your thumb and probe gently with an awl; sound wood resists, while rot feels soft or crumbly. Look for dark staining, bubbling paint, and cracked caulk that channels water behind boards.
Mark suspect spots and trace moisture sources so you fix the cause, not just the symptom. This inspection protects ROI by targeting Wood preservation and enabling Pest prevention before insects exploit damp, weakened fibers and spread.
Gather Tools for Exterior Wood Repair
Now that you’ve marked every soft spot and traced where water’s getting in, set yourself up with the right repair tools so you can fix damage once and avoid repeat paint failure.
Start with a sharp awl or pick, a stiff putty knife, and a 5-in-1 tool to probe, open checks, and clean out punky fibers.
Add a carbide scraper and sanding block for tight edges, plus a quality caulk gun and mixing board for epoxy.
For Power tools, you’ll get the best ROI from a random-orbit sander, a drill/driver, and a multi-tool for precise trimming.
Don’t skip Safety equipment: nitrile gloves, eye protection, a P100 respirator, and hearing protection.
Buy fewer, better tools—they pay back in faster repairs.
Remove Peeling Paint From Exterior Woodwork
Start by spotting every area where paint is peeling, bubbling, or cracking, because any loose edge will ruin your new coat and waste materials. Scrape off what’s failing with a putty knife or paint scraper.
Then use a stripper only where scraping can’t reach or the paint won’t release. You’ll spend a bit more time upfront, but you’ll save on primer and repaint cycles by building on a solid, paint-ready surface.
Identify Peeling Paint Areas
Even if the wood looks mostly fine from the curb, peeling paint usually hides at edges and high-wear spots, so you’ll save time and materials by finding every failure point first. Walk the trim with a bright flashlight and your fingers, checking corners, end grain, joints, and drip edges where water sits. Look for curling lips, hairline cracks, bubbles, and chalky film; mark each spot with painter’s tape so you don’t miss it later.
Tap suspect areas lightly—hollow sounds signal poor adhesion. Note sun-blasted faces and sprinkler splash zones; they’ll need extra attention in your plan and budget. Photograph sections for color matching and consistent paint selection, preventing costly rework and touch-up patches that telegraph after drying.
Scrape And Strip Paint
With your taped trouble spots mapped out, you can strip back every loose edge before it spreads under fresh paint. Start with a sharp carbide scraper and pull with the wood grain, not across it, to avoid gouges that’ll telegraph through your final paint color. Keep a drop cloth down so cleanup doesn’t eat time.
Feather the margins using 80–120 grit paper until you can’t catch a fingernail on the changeover.
For thick layers, soften them with a heat gun on low or a budget chemical stripper; both cut labor and reduce wasted primer. Work small sections, wipe residue, and let the surface dry fully. Stop when only sound, tight paint remains.
This prep costs little, but it protects the repaint investment for years.
Repair Cracks and Gouges in Exterior Woodwork
After you’ve scraped off the loose paint, check every crack and gouge for soft wood and trapped moisture so you don’t waste money patching a problem that’ll fail fast.
Pick an exterior-grade wood filler that matches the repair size, then pack it in, shape it tight, and sand it flush to avoid extra coats and callbacks.
Finish with primer over the repair so your topcoat bonds well and lasts longer, boosting the payoff on your time and materials.
Assess Damage And Moisture
Before you buy fillers or paint, inspect the woodwork closely and confirm it’s dry, because moisture and hidden rot will ruin any repair and waste your money. Press with a screwdriver at joints, end grain, and under peeling paint; soft fibers, crumbling edges, or dark staining signal decay that needs more than cosmetic work.
Check fasteners and seams for movement that will reopen cracks. For moisture control, look for failed caulk, gutter overflow, splashback, and vegetation trapping water against trim.
Use a moisture meter if you’ve got one; aim for stable, dry readings before you proceed.
Do a Seasonal assessment: inspect after heavy rain and again after a dry spell to spot leaks versus lingering saturation. Fix water sources first to protect your repaint investment.
Choose Exterior Wood Filler
Once you’ve confirmed the trim is solid and dry, pick a filler that matches the damage so your repair lasts and you don’t pay twice. For hairline cracks and small nail holes, use a paintable exterior spackle or lightweight acrylic filler—cheap, fast, and good enough under paint.
For deeper gouges, missing corners, or spots that flex, step up to a two-part epoxy wood filler; it costs more but bonds hard, resists water, and cuts call-backs. If you’re repairing stained or clear-coated woodwork, choose a stainable filler and plan for careful color matching; cheaper fillers can flash through.
Look for products that claim exterior use, shrink resistance, and adhesion. For visible areas, choose a filler that can mimic wood grain instead of drying glass-smooth.
Shape, Sand, And Prime
Your filler choice sets the strength of the repair, but your shaping, sanding, and priming determine whether it disappears under paint and stays sealed through weather.
Once the patch cures, shave it flush with a sharp scraper or chisel, then fair the edges so you don’t leave a halo line. Sand in steps—80 to level, 120 to refine, 180 to match surrounding texture patterns—so the repair doesn’t telegraph after topcoats.
Vacuum dust and wipe with a damp rag.
Spot-prime bare wood and filler with a quality exterior bonding primer, feathering onto sound paint. Primer locks out moisture, boosts adhesion, and evens porosity so your finish coats hit a consistent paint sheen, reducing repaints and protecting your budget long-term.
Replace Rotten Exterior Woodwork When Needed
Even if you’re aiming for a quick scrape-and-paint, you’ll get a better ROI by replacing exterior boards that are truly rotten instead of trying to patch them. Start with a blunt rot assessment: probe with an awl or screwdriver, and if the tool sinks easily, fibers crumble, or the damage runs deep past the surface, plan on Wood replacement.
Cut back to sound wood, remove fasteners, and pull the piece without tearing adjacent trim. Match thickness and profile so your paint system performs evenly and you don’t telegraph seams. Prime all faces and end grain before installation to slow future moisture pickup.
Reuse good hardware when possible, but don’t skimp on corrosion-resistant nails or screws—failed fasteners waste labor. The upfront material cost is small compared with repeat repairs and repaint cycles.
Sand and Caulk Exterior Woodwork for a Tight Seal
With any rotten boards replaced, you can now lock in a longer-lasting paint job by tightening up the surfaces and seams. Start by sanding peeling edges and rough grain with 80–120 grit, feathering gradations so water can’t sit on ridges. Vacuum dust and wipe clean; leftover grit ruins caulk lines and wastes paint.
Next, run a high-quality exterior paintable caulk along joints, trim miters, and gaps around window and door casings. Tool the bead smooth to shed water and stop drafts—simple Weatherproofing techniques that cut moisture damage and reduce repaint cycles.
Don’t caulk horizontal weep paths or under siding laps. Let caulk cure per label before moving on. A tight, uniform surface also improves paint color selection results, preventing shadow lines and uneven sheen.
Prime Exterior Woodwork for Lasting Paint Adhesion
After you’ve sanded and caulked, seal the wood with a quality exterior primer so the topcoat bonds hard instead of failing early. Good surface preparation isn’t finished until you lock down bare fibers, chalky residue, and repaired spots with primer that matches your conditions—bonding for sound paint, stain-blocking for knots, or high-build for weathered grain.
Spot-prime exposed wood and filler first, then prime full sections so you don’t leave “picture frames” that telegraph later. For primer application, brush primer into end grain, joints, and profiles, then back-brush after rolling to improve penetration and coverage.
Keep an eye on spread rate; stretching primer costs you repaint cycles. Let it cure per the label before you move on, and you’ll buy years of service for a few dollars more.
Paint Exterior Woodwork for a Durable Finish
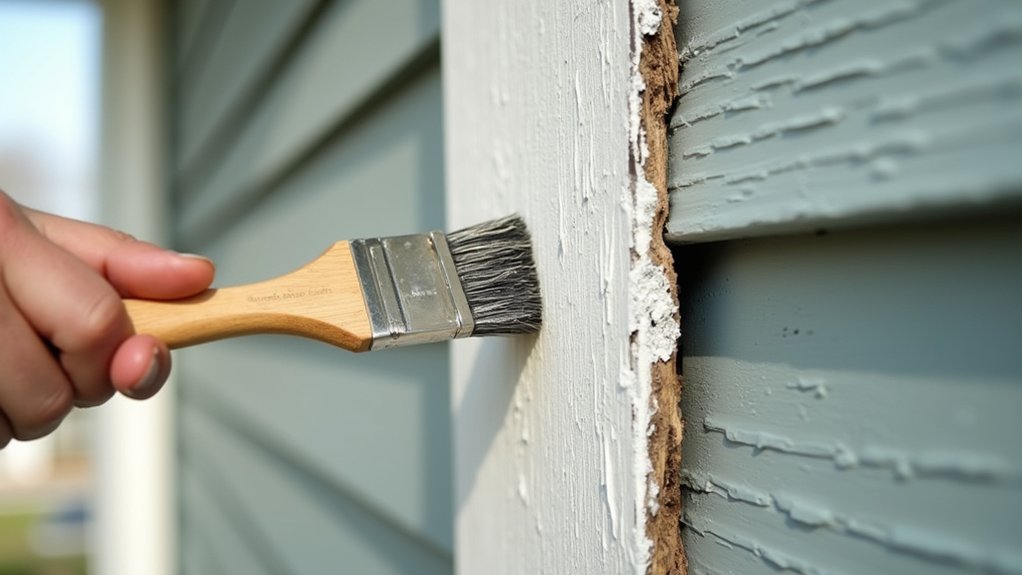
Once the primer has cured hard, you’re ready to put on paint that sheds water, blocks UV, and takes the daily abuse that chews through exterior trim.
Choose a 100% acrylic exterior paint; it flexes with wood and saves you repainting cycles.
Do smart Color selection: lighter shades reduce heat stress and peeling, while darker colors may fade faster on sunny exposures.
Match your paint finish to the surface: satin balances washability and hides defects; semi-gloss adds maximum moisture resistance for doors, sills, and fascia but shows brush marks.
Apply two thin coats, not one thick one, and keep a wet edge to avoid lap lines.
Paint early or late, skip windy days, and you’ll get longer service life per dollar spent.
Frequently Asked Questions
How Long Should Exterior Paint Cure Before Exposing It to Rain?
You should give exterior paint 24–48 hours before rain; longer in cool, humid weather. That protects paint adhesion and boosts ROI by avoiding costly touch-ups. Use weatherproofing techniques like tarps and timed painting windows.
What Temperature and Humidity Are Best for Painting Exterior Woodwork?
Aim for 50–85°F with low-to-moderate moisture: 40–60% RH. Temperature considerations help paint level and bond; Humidity control speeds dry time, reduces rework, and protects your ROI—avoid damp mornings or scorching afternoons.
Should I Use Oil-Based or Water-Based Paint for Exterior Trim?
Go water-based acrylic for exterior trim—oil’s not magical armor. You’ll get strong paint durability, faster drying, easy cleanup, and fewer failures. Do ruthless surface preparation, and you’ll boost ROI with longer repaint cycles.
How Do I Prevent Tannin Bleed From Cedar or Redwood Trim?
Stop tannin bleed by sealing raw cedar with a stain-blocking primer (shellac or high-quality oil) before painting. Spot-prime knots, keep coats thin, and topcoat fast. This prevents cedar staining and avoids costly repaints.
How Often Should Exterior Woodwork Be Repainted in Harsh Climates?
In harsh climates, you should repaint exterior woodwork every 3–5 years, sooner on sun-facing sides. You’ll boost paint durability and ROI by picking proven color schemes, washing annually, and touching up fast.